Raspberry Pi IoT VNC Viewer Free: Your Ultimate Guide To Remote Access
Hey there tech enthusiasts, listen up! If you're diving into the world of IoT (Internet of Things) and Raspberry Pi, you’re probably searching for ways to make your projects more accessible remotely. Let me introduce you to a game-changer: Raspberry Pi IoT VNC Viewer Free. This setup allows you to control your Raspberry Pi from anywhere, without breaking the bank. So, buckle up because we’re about to take a deep dive into this amazing technology!
Now, you might be wondering, “Why should I care about VNC Viewer?” Well, let me break it down for you. Imagine being able to manage your IoT devices from your couch, or even when you're out of town. Sounds pretty cool, right? With VNC Viewer, you can do exactly that. It’s like having a remote control for your Raspberry Pi, and the best part? It’s free!
But before we get too far ahead of ourselves, let’s first understand what VNC Viewer is and how it fits into the grand scheme of things. This isn’t just another tool; it’s a powerful solution that can make your life easier, especially if you’re working on complex IoT projects. Ready to learn more? Let’s dive in!
- Virginia Madsen Net Worth A Deep Dive Into The Wealth Of This Talented Actress
- Luke Nichols Wikipedia A Deep Dive Into The Life And Legacy Of A True Star
What is Raspberry Pi IoT VNC Viewer Free?
Alright, let’s start with the basics. Raspberry Pi IoT VNC Viewer Free is a software application that lets you remotely access your Raspberry Pi’s desktop environment from another device. Whether you’re using a computer, tablet, or smartphone, VNC Viewer connects you to your Pi seamlessly. This means you can control your IoT devices, run scripts, and monitor data without needing physical access to the hardware.
Here’s the kicker: VNC Viewer doesn’t cost you a dime. That’s right, folks, it’s completely free! And if you’re thinking, “How does something so powerful come at no cost?” Well, it’s all about accessibility and empowering developers to create amazing projects without financial barriers.
How Does VNC Viewer Work?
Let’s break it down step by step. VNC Viewer works by establishing a connection between your Raspberry Pi and the device you’re using to access it. Here’s how it goes:
- What Is Data Visualization In Iot Unlocking The Power Of Connected Insights
- Alanna Masterson Relationship The Inside Scoop On Love Life And Everything In Between
- Install VNC Server on Raspberry Pi: First, you’ll need to set up the VNC Server on your Pi. This allows it to receive remote connections.
- Download VNC Viewer on Your Device: Next, grab the VNC Viewer app for your computer, tablet, or smartphone. It’s available on most platforms, so you’re covered no matter what device you use.
- Connect the Two: Once both the server and viewer are ready, simply enter your Raspberry Pi’s IP address into VNC Viewer and voilà! You’re connected.
It’s as simple as that. No complicated configurations or expensive hardware required. Just pure, unadulterated remote access goodness!
Why Use Raspberry Pi IoT VNC Viewer Free?
Now that we know what it is and how it works, let’s talk about why you should care. Here are a few reasons why Raspberry Pi IoT VNC Viewer Free is a must-have in your tech toolkit:
1. Cost-Effective
Who doesn’t love saving money? With VNC Viewer, you don’t have to shell out cash for expensive remote access solutions. This makes it an excellent choice for hobbyists, students, and even small businesses on a budget.
2. Cross-Platform Compatibility
Whether you’re using Windows, macOS, Linux, Android, or iOS, VNC Viewer has got you covered. This flexibility ensures that you can access your Raspberry Pi from virtually any device, making it incredibly convenient.
3. Easy to Set Up
No need to be a tech wizard to get VNC Viewer up and running. The setup process is straightforward, and there are plenty of tutorials available to guide you through it. Even if you’re new to Raspberry Pi, you’ll find it easy to master.
4. Secure Connection
Security is a top priority, and VNC Viewer doesn’t disappoint. It uses encryption to protect your data during transmission, ensuring that your IoT projects remain safe from prying eyes.
Setting Up Raspberry Pi IoT VNC Viewer Free
Alright, let’s get our hands dirty and set up VNC Viewer on your Raspberry Pi. Follow these steps carefully, and you’ll be good to go:
Step 1: Enable VNC Server
First things first, you’ll need to enable the VNC Server on your Raspberry Pi. Here’s how:
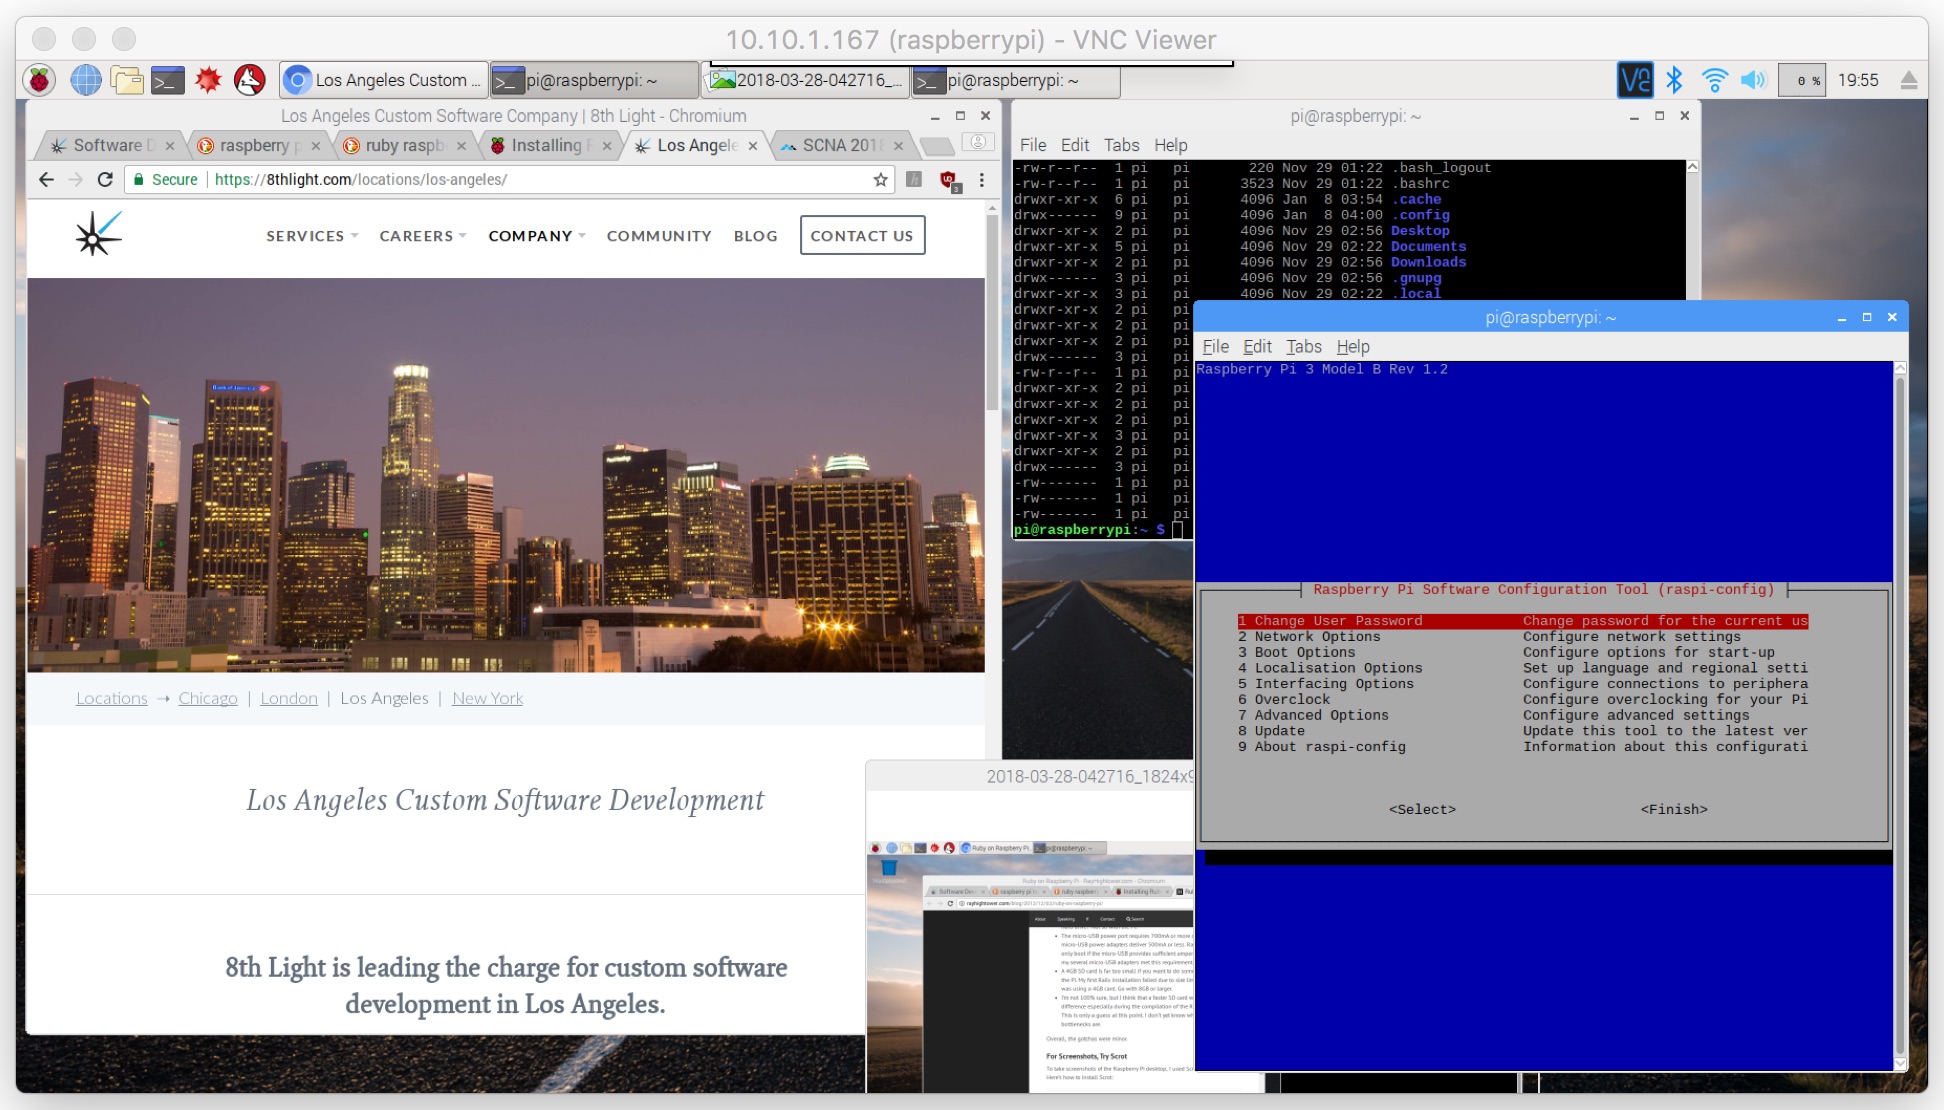
- Open the Raspberry Pi Configuration tool by typing
sudo raspi-configin the terminal. - Select Interfacing Options and then enable VNC.
- Reboot your Pi to apply the changes.
Step 2: Install VNC Viewer
Next, download and install the VNC Viewer app on your device. You can find it on the official VNC website or your platform’s app store.
Step 3: Connect to Your Pi
Finally, connect to your Raspberry Pi using its IP address. You can find the IP address by typing hostname -I in the terminal. Enter this address into VNC Viewer, and you’re all set!
Exploring IoT Projects with Raspberry Pi
Now that you’ve got VNC Viewer up and running, it’s time to explore some exciting IoT projects. Here are a few ideas to get you started:
1. Home Automation System
Create a smart home by connecting various devices to your Raspberry Pi. Use VNC Viewer to monitor and control everything from your smartphone, no matter where you are.
2. Weather Station
Set up a weather station using sensors connected to your Pi. With VNC Viewer, you can check real-time weather data from anywhere in the world.
3. Security Camera
Turn your Raspberry Pi into a security camera and use VNC Viewer to keep an eye on your property remotely. It’s a great way to enhance home security without spending a fortune.
Troubleshooting Common Issues
Even the best tools can sometimes throw a curveball. Here are some common issues you might encounter with Raspberry Pi IoT VNC Viewer Free and how to fix them:
1. Connection Issues
If you’re having trouble connecting, double-check your Pi’s IP address and ensure that both the VNC Server and Viewer are properly installed. Also, make sure your network connection is stable.
2. Slow Performance
Slow performance can be caused by a weak internet connection or an overloaded Raspberry Pi. Try optimizing your Pi’s resources or upgrading your network hardware if necessary.
3. Security Concerns
Always use strong passwords and enable encryption to keep your data safe. Regularly update your software to protect against potential vulnerabilities.
Advanced Features of VNC Viewer
Once you’ve mastered the basics, it’s time to explore some of VNC Viewer’s advanced features. Here are a few highlights:
1. File Transfer
Transfer files between your Raspberry Pi and your device with ease. This is perfect for managing project files or sharing data.
2. Multi-User Access
Allow multiple users to access your Raspberry Pi simultaneously. This is great for collaborative projects or team environments.
3. Customizable Settings
Tweak settings such as display resolution, color depth, and connection speed to optimize your VNC Viewer experience.
Conclusion: Take Control of Your IoT Projects
And there you have it, folks! Raspberry Pi IoT VNC Viewer Free is an incredible tool that opens up a world of possibilities for IoT enthusiasts. Whether you’re building a smart home, monitoring weather data, or enhancing your home security, VNC Viewer makes remote access a breeze.
So, what are you waiting for? Dive in, experiment, and let us know how it goes. Feel free to leave a comment below or share this article with your fellow tech enthusiasts. Remember, the more we share knowledge, the better we all become!
Table of Contents
- What is Raspberry Pi IoT VNC Viewer Free?
- How Does VNC Viewer Work?
- Why Use Raspberry Pi IoT VNC Viewer Free?
- Setting Up Raspberry Pi IoT VNC Viewer Free
- Exploring IoT Projects with Raspberry Pi
- Troubleshooting Common Issues
- Advanced Features of VNC Viewer
- Conclusion
- Whats The Real Deal Behind The Upside Down Flag Meaning Lets Dive In
- Goggins Actor The Rise Of A Fitness Icon In Hollywood

VNC Remote access a Raspberry Pi — Raspberry Pi Official Magazine

Remote control your Raspberry Pi from your PC with VNC! Howto
Raspberry pi vnc viewer dreamsgerty
