Raspberry Pi VNC Port Forwarding: The Ultimate Guide To Remote Access
Hey there, tech enthusiasts! If you've ever wondered how to set up Raspberry Pi VNC port forwarding, you're in the right place. This guide will take you through everything you need to know about remote access using VNC on your Raspberry Pi. Whether you're a hobbyist or a professional, this setup can save you tons of time and effort.
Imagine being able to control your Raspberry Pi from anywhere in the world. Sounds cool, right? With VNC port forwarding, you can do just that. This technology allows you to access your Pi's desktop interface remotely, giving you full control as if you were sitting right in front of it.
But wait, why Raspberry Pi VNC port forwarding specifically? Well, Raspberry Pi has become a go-to device for many DIY projects, home automation systems, and even server setups. Pairing it with VNC makes it even more powerful. So, let's dive in and explore how you can make this magic happen!
- Jackerman Video The Ultimate Guide To Mastering The Viral Sensation
- How Much Is Jonathan Majors Worth Unpacking The Stars Rising Net Worth
What is Raspberry Pi VNC Port Forwarding?
Raspberry Pi VNC port forwarding is a technique that allows you to securely access your Raspberry Pi's desktop environment from another device over the internet. VNC stands for Virtual Network Computing, and it enables you to remotely control one computer from another. By setting up port forwarding on your router, you can direct incoming connections to your Raspberry Pi, making it accessible from anywhere.
Why Use Raspberry Pi VNC?
Using VNC with your Raspberry Pi offers several advantages:
- Remote Control: Access your Pi's desktop interface from any device with an internet connection.
- Efficiency: Manage your projects without needing physical access to the device.
- Flexibility: Work on your projects from anywhere, whether you're at home, at work, or on vacation.
- Cost-Effective: No need for additional hardware or expensive software solutions.
How Does VNC Work on Raspberry Pi?
VNC works by transmitting the screen of one device (the Raspberry Pi, in this case) to another device (your laptop, smartphone, or tablet). This is done through a client-server model, where the Raspberry Pi acts as the server and your device acts as the client. When you set up Raspberry Pi VNC port forwarding, you're essentially creating a pathway for this communication to happen over the internet.
- Virginia Madsen Net Worth A Deep Dive Into The Wealth Of This Talented Actress
- Whats The Real Deal Behind The Upside Down Flag Meaning Lets Dive In
Key Components of VNC on Raspberry Pi
Here are the main components involved in setting up VNC on your Raspberry Pi:
- VNC Server: Installed on your Raspberry Pi to share its desktop.
- VNC Viewer: The client application you use to connect to the Raspberry Pi.
- Port Forwarding: Configuring your router to direct incoming VNC connections to your Raspberry Pi.
Setting Up VNC on Raspberry Pi
Before diving into port forwarding, you'll need to set up VNC on your Raspberry Pi. Follow these steps:
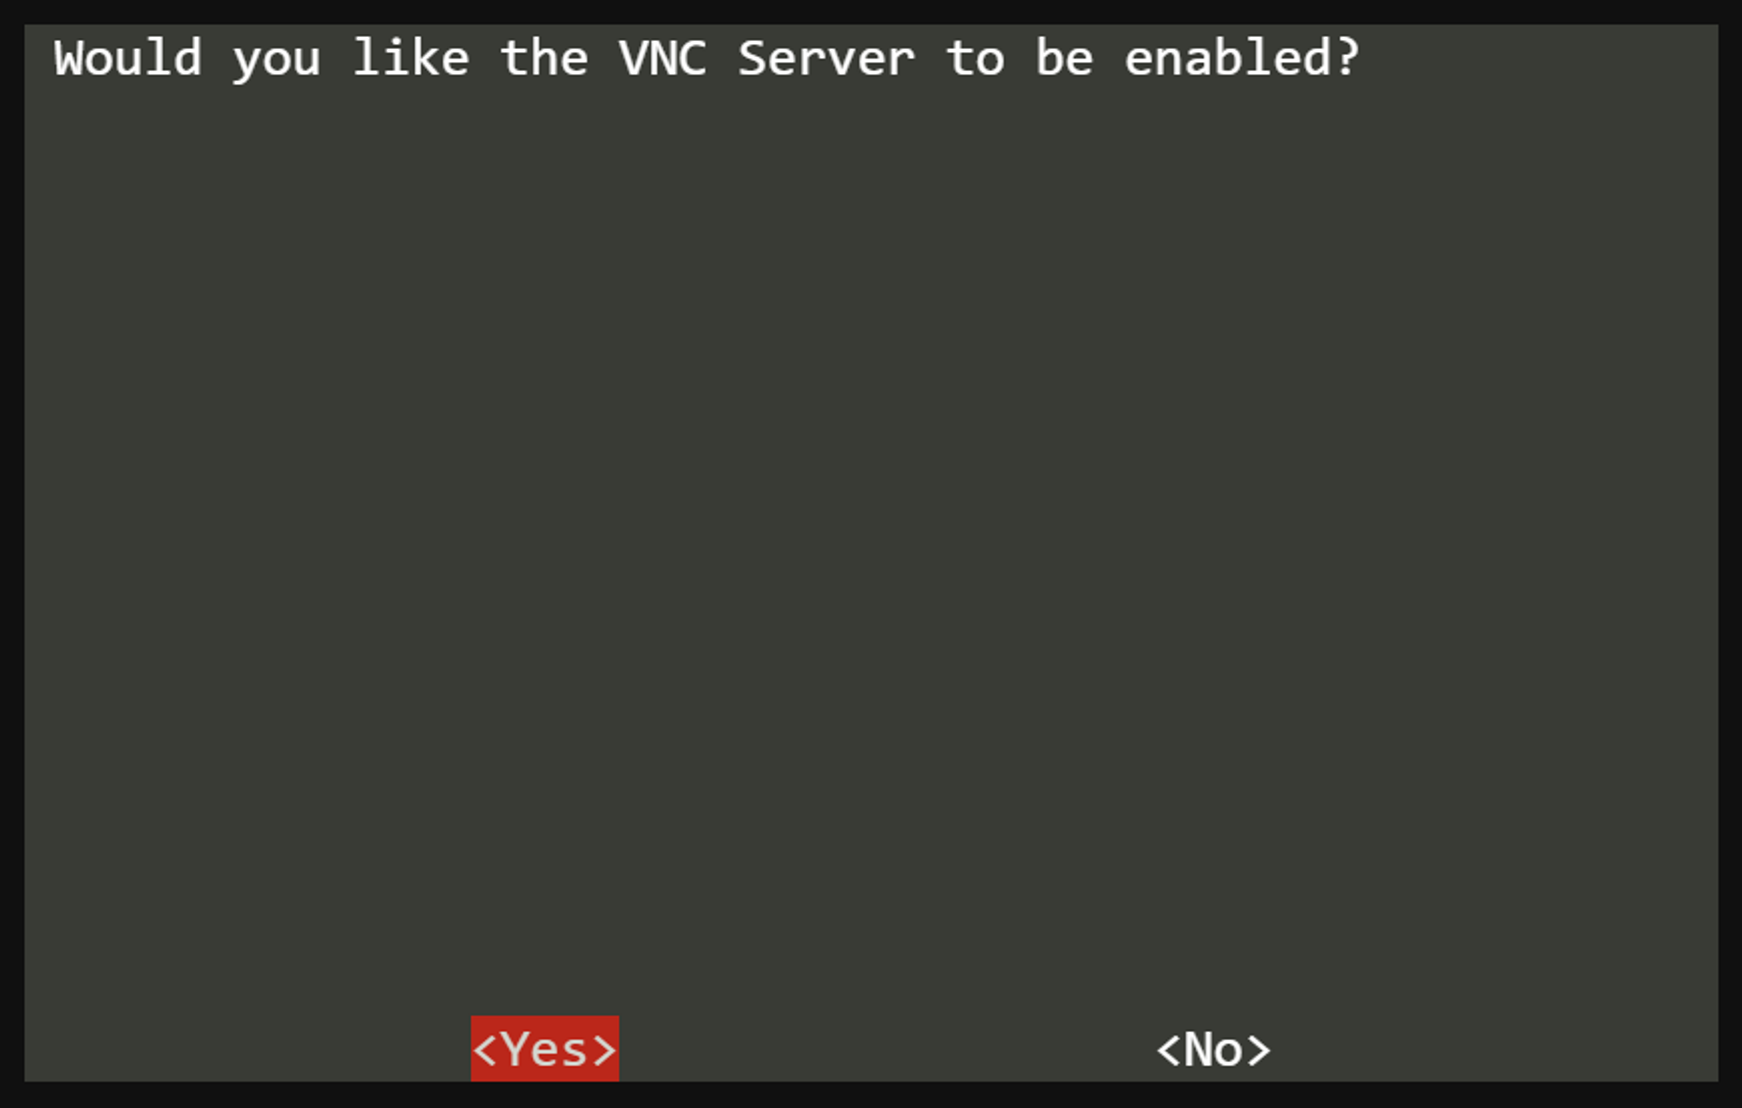
Step 1: Enable VNC on Raspberry Pi
Head over to the Raspberry Pi Configuration menu and enable the VNC service. You can do this through the graphical interface or via the command line using the following command:
sudo raspi-config
From there, navigate to Interfacing Options > VNC and enable it.
Step 2: Install VNC Viewer
Download and install the VNC Viewer application on the device you plan to use for remote access. It's available for Windows, macOS, Linux, Android, and iOS.
Raspberry Pi VNC Port Forwarding Setup
Now that VNC is up and running on your Raspberry Pi, it's time to configure port forwarding on your router. Here's how you can do it:
Step 1: Find Your Raspberry Pi's IP Address
Open the terminal on your Raspberry Pi and type the following command:
hostname -I
This will display the local IP address of your Raspberry Pi, which you'll need for the next step.
Step 2: Log in to Your Router
Access your router's admin interface by entering its IP address into a web browser. You can usually find this information on the router itself or in the manual.
Step 3: Configure Port Forwarding
Look for the port forwarding section in your router's settings. Add a new rule, specifying the following details:
- Service Name: VNC
- External Port: 5900
- Internal IP Address: The IP address of your Raspberry Pi
- Internal Port: 5900
Securing Your Raspberry Pi VNC Connection
Security is crucial when setting up remote access. Here are some tips to keep your Raspberry Pi VNC connection safe:
- Use Strong Passwords: Ensure your Raspberry Pi has a strong, unique password.
- Enable SSH: Consider using SSH tunneling to add an extra layer of security.
- Update Regularly: Keep your Raspberry Pi's software up to date to protect against vulnerabilities.
Troubleshooting Raspberry Pi VNC Port Forwarding
Encountering issues with your VNC setup? Here are some common problems and solutions:
- Connection Refused: Double-check your port forwarding settings and ensure VNC is enabled on your Raspberry Pi.
- Slow Performance: Optimize your VNC settings or upgrade your internet connection for better performance.
- Security Warnings: Make sure you're using a trusted VNC viewer and have proper security measures in place.
Best Practices for Raspberry Pi VNC Port Forwarding
To make the most out of your Raspberry Pi VNC setup, follow these best practices:
- Regular Backups: Keep backups of important data on your Raspberry Pi.
- Monitor Usage: Keep an eye on who's accessing your Pi to prevent unauthorized access.
- Optimize Settings: Adjust VNC settings for the best balance between performance and security.
Conclusion
In conclusion, Raspberry Pi VNC port forwarding opens up a world of possibilities for remote access and control. By following the steps outlined in this guide, you can set up a secure and efficient VNC connection to your Raspberry Pi. Whether you're working on a personal project or managing a server, this setup can significantly enhance your productivity.
So, what are you waiting for? Dive in and start exploring the potential of Raspberry Pi VNC port forwarding today! Don't forget to share your thoughts and experiences in the comments below. And if you found this guide helpful, feel free to share it with your fellow tech enthusiasts.
Happy tinkering!
Table of Contents
- What is Raspberry Pi VNC Port Forwarding?
- Why Use Raspberry Pi VNC?
- How Does VNC Work on Raspberry Pi?
- Key Components of VNC on Raspberry Pi
- Setting Up VNC on Raspberry Pi
- Raspberry Pi VNC Port Forwarding Setup
- Securing Your Raspberry Pi VNC Connection
- Troubleshooting Raspberry Pi VNC Port Forwarding
- Best Practices for Raspberry Pi VNC Port Forwarding
- Conclusion
- Is Shaq Married The Untold Story Behind The Big Diesels Love Life
- Alanna Masterson Relationship The Inside Scoop On Love Life And Everything In Between

VNC Remote access a Raspberry Pi — Raspberry Pi Official Magazine

Remote control your Raspberry Pi from your PC with VNC! Howto
Take Control Remotely with Raspberry Pi VNC
