How To Access Raspberry Pi With Public IP: A Beginner's Guide
Accessing your Raspberry Pi using a public IP can seem like a daunting task, but trust me, it's not as complicated as it sounds. Whether you're a tech enthusiast or just starting out with your Pi, this guide is here to walk you through the process step-by-step. In today’s interconnected world, being able to remotely access your Raspberry Pi is an essential skill that opens up a world of possibilities—from running your own web server to setting up a home automation system. So, let's dive in and make your Raspberry Pi accessible from anywhere!
Before we get into the nitty-gritty, it's important to understand why accessing Raspberry Pi via public IP is such a game-changer. Imagine being able to control your home devices, monitor your security cameras, or access your personal files no matter where you are. Sounds cool, right? But hold up, there are some security considerations you need to keep in mind. We'll cover all of that, so you can set up your Pi securely and confidently.
In this guide, we’ll explore everything you need to know about accessing Raspberry Pi with a public IP. From setting up port forwarding to configuring firewalls, we’ve got you covered. By the end of this article, you'll have all the tools and knowledge to make your Raspberry Pi accessible from anywhere in the world. Let's get started!
- Melina Goranssen The Rising Star Taking The World By Storm
- Michael Cimino Actor The Man Behind The Lens And Beyond The Spotlight
Table of Contents
- What is a Public IP Address?
- Raspberry Pi Basics
- Why Use a Public IP?
- Setting Up Public IP Access
- Port Forwarding Explained
- Security Measures
- Dynamic DNS
- Troubleshooting Tips
- Tools and Software
- Final Thoughts
What is a Public IP Address?
A public IP address is like your home's street address, but for your internet connection. It's the unique identifier that allows your devices to communicate with the outside world. Unlike a private IP address, which is only visible within your local network, a public IP address is visible to the entire internet.
When you want to access your Raspberry Pi remotely, you'll need to use its public IP address. This is what allows devices outside your network to locate and connect to your Pi. However, keep in mind that public IPs can change depending on your internet service provider, which is where dynamic DNS comes in handy—but more on that later.
Types of Public IP Addresses
There are two main types of public IP addresses: static and dynamic. A static IP address remains the same and never changes, making it ideal for hosting servers or accessing devices remotely. On the other hand, a dynamic IP address changes periodically, which can complicate remote access unless you use a dynamic DNS service.
- Whats The Real Deal Behind The Upside Down Flag Meaning Lets Dive In
- Matthew Le Nevez The Rising Star Redefining Success In The Spotlight
Raspberry Pi Basics
Before we dive deeper into accessing your Raspberry Pi with a public IP, let's quickly go over some basics. The Raspberry Pi is a small, affordable computer that can be used for a wide range of projects. From setting up media centers to creating IoT devices, the possibilities are endless.
To get started, you'll need a few things:
- Raspberry Pi board (any model will do)
- MicroSD card with Raspberry Pi OS installed
- Power supply
- Keyboard and monitor (optional)
Once you have everything set up, you can start configuring your Pi to be accessible over the internet.
Why Use a Public IP?
Using a public IP address to access your Raspberry Pi offers several advantages. First and foremost, it allows you to control your Pi from anywhere in the world. Whether you're at work, on vacation, or just hanging out at a coffee shop, you can still access your Pi as if you were sitting right in front of it.
Additionally, having remote access to your Pi can save you time and effort. Instead of physically going to your device to make changes or troubleshoot issues, you can do it all from the comfort of your couch. Plus, it opens up a whole new world of possibilities for automation and remote monitoring.
Use Cases for Remote Access
Here are a few examples of what you can do with remote access:
- Monitor security cameras
- Access personal files and backups
- Run a web server
- Control smart home devices
Setting Up Public IP Access
Now that you understand the basics, let's move on to setting up public IP access for your Raspberry Pi. The process involves a few key steps: finding your public IP address, configuring port forwarding, and setting up security measures.
Step 1: Find Your Public IP Address
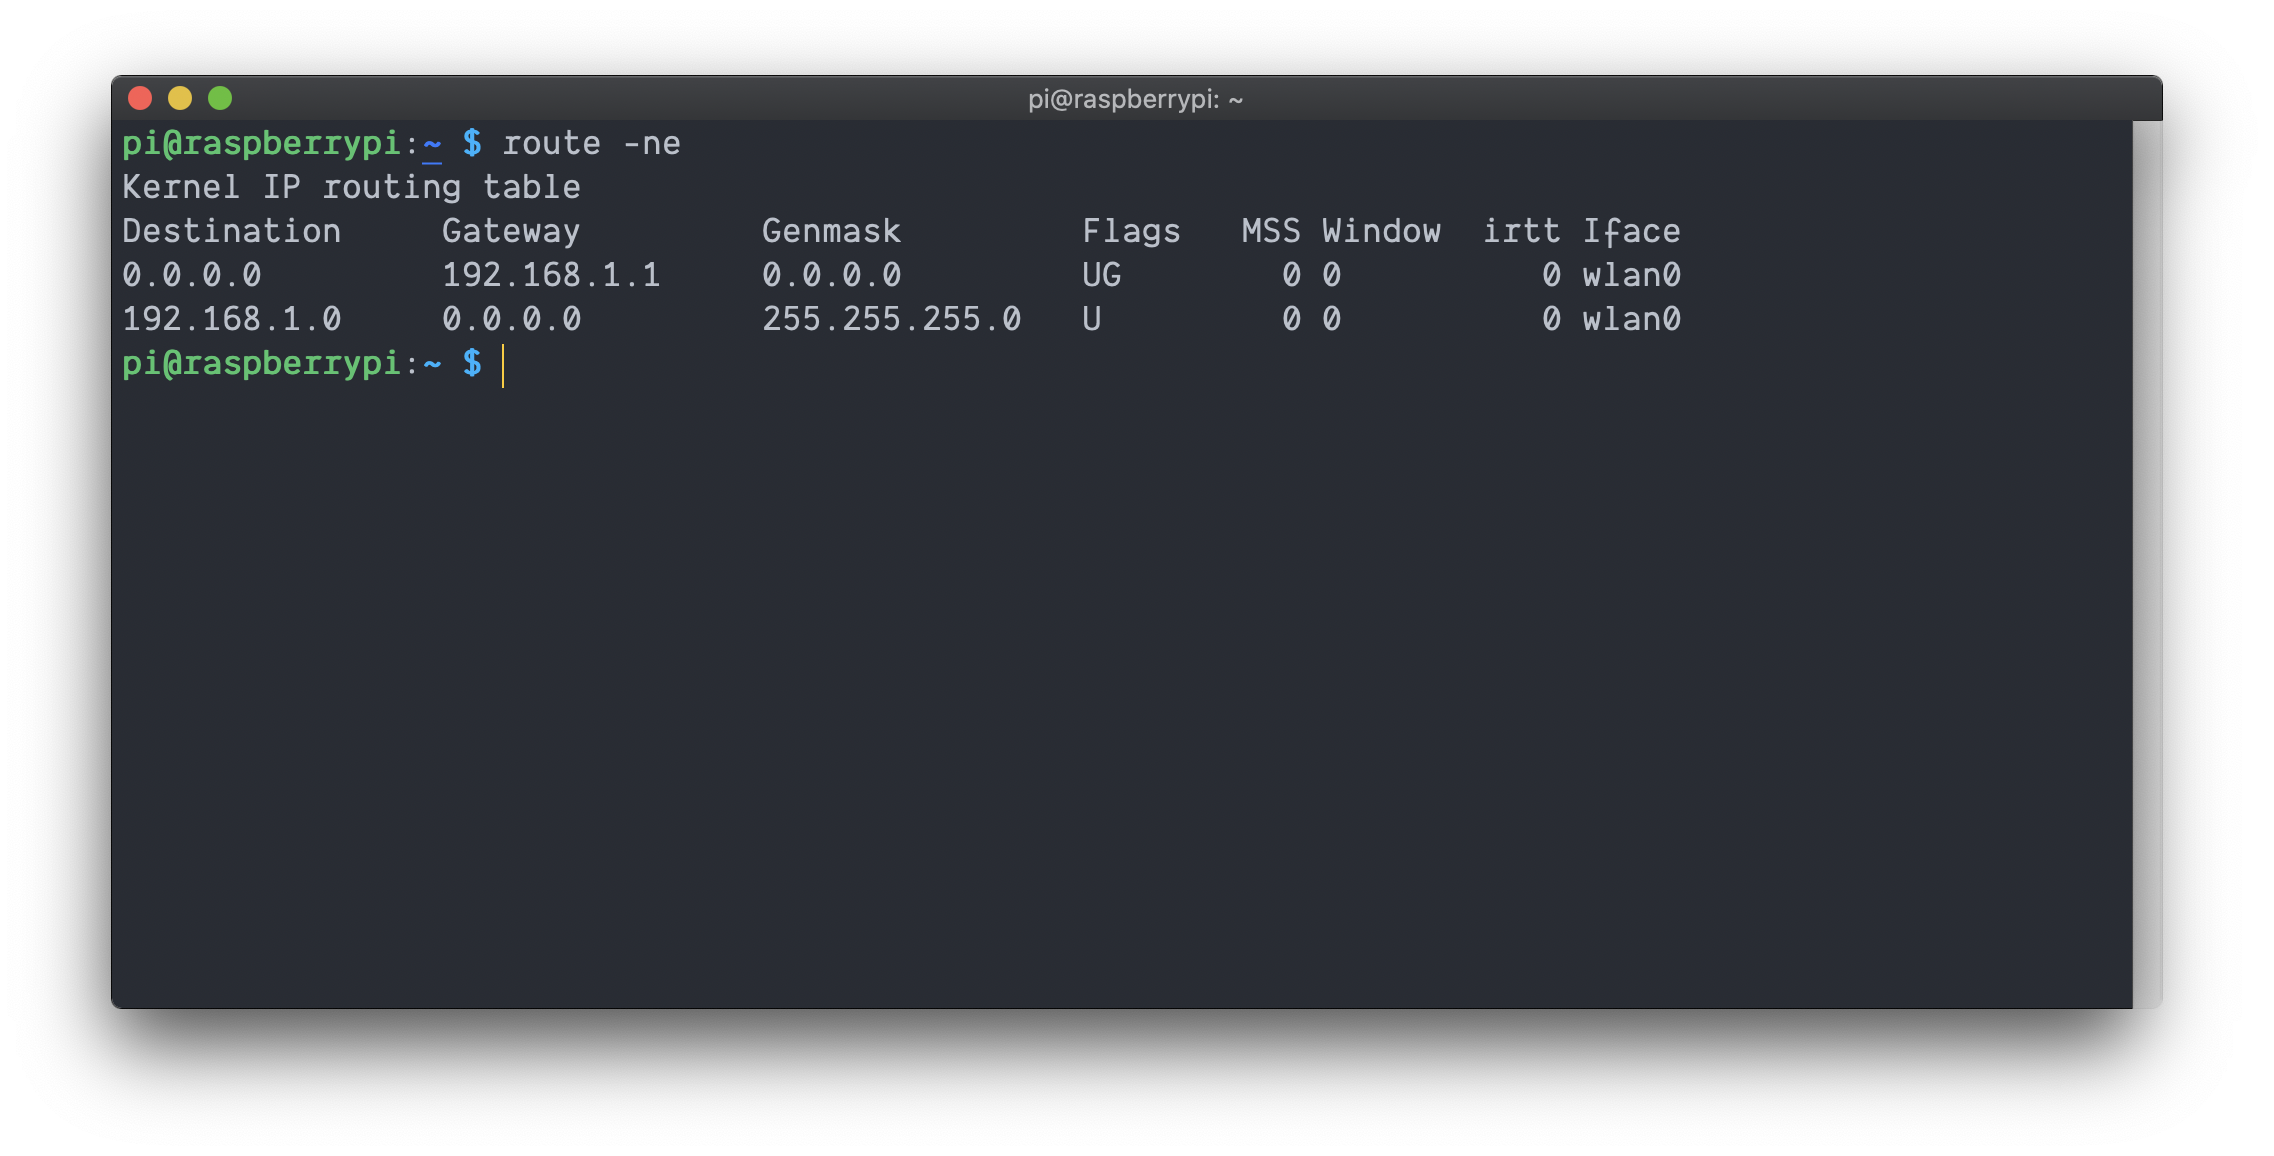
The first step is to find your public IP address. You can do this by simply typing "What is my IP address" into a search engine. Your public IP will be displayed at the top of the search results.
Step 2: Configure Port Forwarding
Port forwarding is the process of directing incoming traffic from your public IP to a specific device on your local network—in this case, your Raspberry Pi. To set this up, you'll need to log into your router's admin interface and configure the necessary settings.
Port Forwarding Explained
Port forwarding might sound intimidating, but it's actually quite straightforward. Essentially, you're telling your router to send incoming traffic on a specific port to your Raspberry Pi's private IP address.
Here’s how you can do it:
- Log into your router's admin panel
- Find the port forwarding section
- Set up a new rule with the following details:
- External port: The port you want to use for remote access (e.g., 22 for SSH)
- Internal port: The same as the external port
- IP address: Your Raspberry Pi's private IP address
- Save the settings and test the connection
Tips for Effective Port Forwarding
Make sure to choose a port that isn't already in use by another service. Additionally, consider using a non-standard port for added security. For example, instead of using port 22 for SSH, you could use something like 2222.
Security Measures
Security is paramount when it comes to accessing your Raspberry Pi over the internet. Without proper measures in place, you could leave your device vulnerable to hackers and malicious actors. Here are a few steps you can take to secure your Pi:
- Use strong passwords
- Enable two-factor authentication
- Install a firewall
- Keep your software up to date
By implementing these measures, you can significantly reduce the risk of unauthorized access to your Raspberry Pi.
Firewall Configuration
A firewall acts as a barrier between your Pi and the outside world, allowing only authorized traffic to pass through. You can set up a firewall on your Pi using tools like UFW (Uncomplicated Firewall). Here's how:
- Install UFW:
sudo apt install ufw - Allow SSH:
sudo ufw allow 22 - Enable the firewall:
sudo ufw enable
Dynamic DNS
If your internet service provider assigns you a dynamic IP address, you'll need to use a dynamic DNS service to keep track of changes. Dynamic DNS automatically updates your domain name to point to your new IP address whenever it changes.
There are several dynamic DNS providers to choose from, such as No-IP and DuckDNS. Most of these services are free and easy to set up. Once configured, you'll be able to access your Raspberry Pi using a consistent domain name instead of worrying about changing IP addresses.
Setting Up Dynamic DNS
Here's how you can set up dynamic DNS:
- Sign up for a dynamic DNS service
- Install the client software on your Raspberry Pi
- Configure the software to update your domain name
- Test the setup to ensure it's working correctly
Troubleshooting Tips
Even with the best-laid plans, things can sometimes go wrong. If you're having trouble accessing your Raspberry Pi with a public IP, here are a few troubleshooting tips:
- Check your router's port forwarding settings
- Verify that your firewall is configured correctly
- Test the connection using a different network
- Ensure your Raspberry Pi is running the latest software
If none of these solutions work, consider reaching out to your internet service provider for further assistance.
Tools and Software
There are several tools and software you can use to make accessing your Raspberry Pi with a public IP easier. Here are a few recommendations:
- SSH clients like PuTTY for Windows or Terminal for macOS/Linux
- Dynamic DNS clients like ddclient
- Firewall tools like UFW
These tools can help streamline the process and make managing your Raspberry Pi more efficient.
Final Thoughts
Accessing your Raspberry Pi with a public IP opens up a world of possibilities for remote control and automation. By following the steps outlined in this guide, you can set up secure and reliable access to your Pi from anywhere in the world.
Remember, security should always be a top priority. Take the necessary precautions to protect your device from potential threats. And don't forget to test your setup thoroughly to ensure everything is working as expected.
Now that you have all the tools and knowledge at your disposal, it's time to take the plunge and start exploring the endless possibilities of remote Raspberry Pi access. Happy tinkering!
If you found this guide helpful, feel free to share it with your friends or leave a comment below. Your feedback helps us improve and create even better content in the future!
- Is Shaq Married The Untold Story Behind The Big Diesels Love Life
- How Much Is Jonathan Majors Worth Unpacking The Stars Rising Net Worth
Assigning a static IP to your Raspberry Pi Hello, friend.
How to set up static IP in raspberry pi

Raspberry Pi WiFi Access Point Raspberry_Pi PiDay RaspberryPi
